Print3Delta
We build this 3D-printer between winter and spring in 2017. Certainly, there existed already a lot of printer you could buy, but the main reason back then was, I wanted to build an open source robot arm for my own. One on which most parts are 3D-printed and you would just put some stepper motors in it and off you go. Well, easily said. But most 3D-printer would not allow such a large printing height. So we had to build something that meets our requirements.
And why buy someting when you can just build it by your own? Where 's the fun in that?!

Overview
At the time we built this. 3D-printing was a very emerging topic. Everybody could just get a printer and build anything one can imagine. A couple years ago one could just dream about that. Anyway, I knew what I wanted, but how would we accomplish this. Fortunately, as this was so popular, one can find tons of information in the web. First the idea was to use some linear motors I had laying around for the actuators. Too bad their accuracy was not as nearly as good as we recuired it to be. So back to the regular stepper motors.
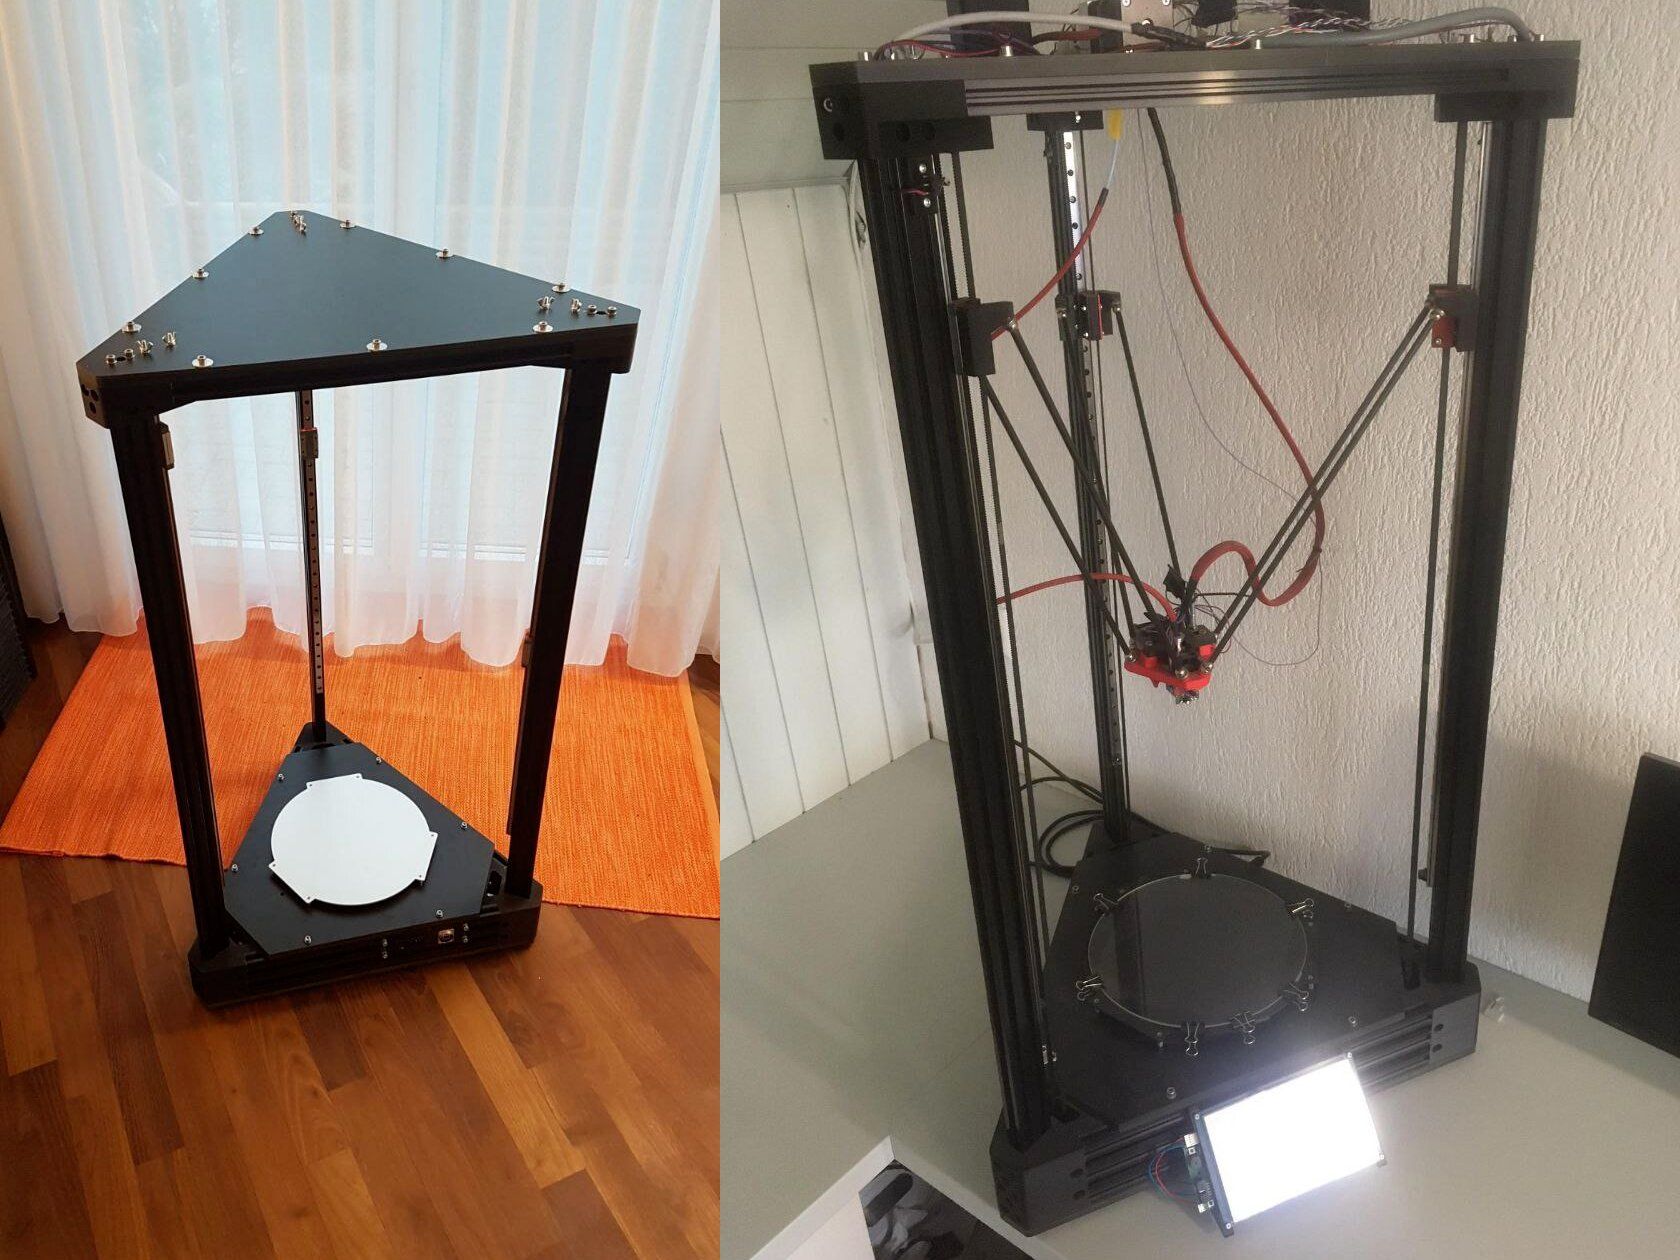
Pretty soon it was clear we would use a delta design as opposed to a regualar XYZ one. Mainly because you get good usable area compared to the overall area of the printer. You loose some space at the top but that doesn't bother us. Also it was clear to use a so called Bowder-extruder. What this means is that only the hot-end itself is mountet on the head and the extruder somewhere else. Thus the head very light and you can print with hight accelerations with hardly any vibration.
So now we had to start the construction. As much parts as possible were 3D-printed. So one could say we built a 3D-printer with a 3D-printer. A friend of mine had one back home and made them for me. Then we had to acuire the all the other stuff. The control unit is a very popular open source project called Duet3D. It was clear we wouldn't develop our own control unit and software as the Duet3D is already a matured system.
Most of the other parts were ordered form china. Yes, you can get relatively good quality parts from there. Only the important parts like hot-end for example were ordered from established brands. I mean, no matter how good the printer might be, when the hotend sucks, you just can't get any good results.
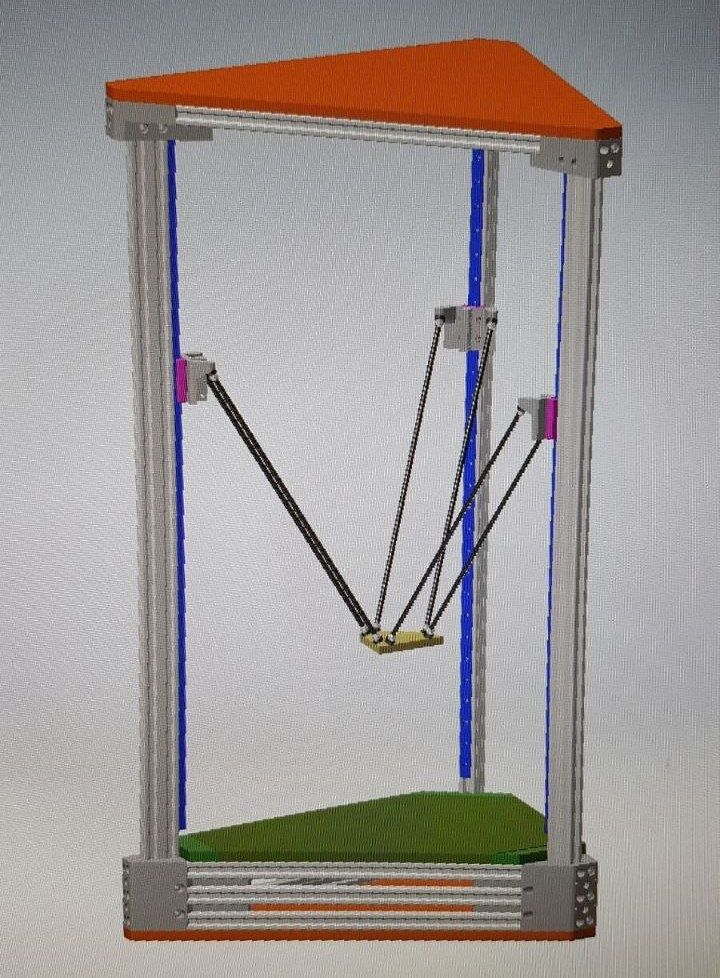
So now we had to design everything in CAD. This was not only necessary to calculate the dimensions needed for the individual parts but also helped a great deal when we had to configure the printer.

After we finally ordered everything, we had to wait a couple of weeks until everything arived. In this time it was like christmas all couple of days. You come home and see something new.
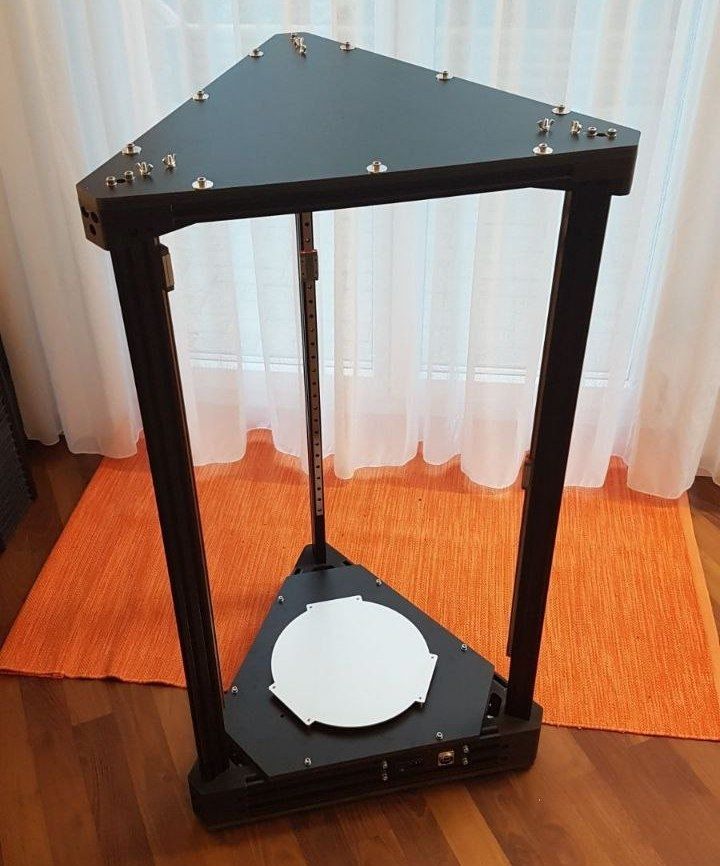
Once we had all parts together, the real fun started. We could finally start to assamble it. You can see the barebone mechanical construction in the following picture:

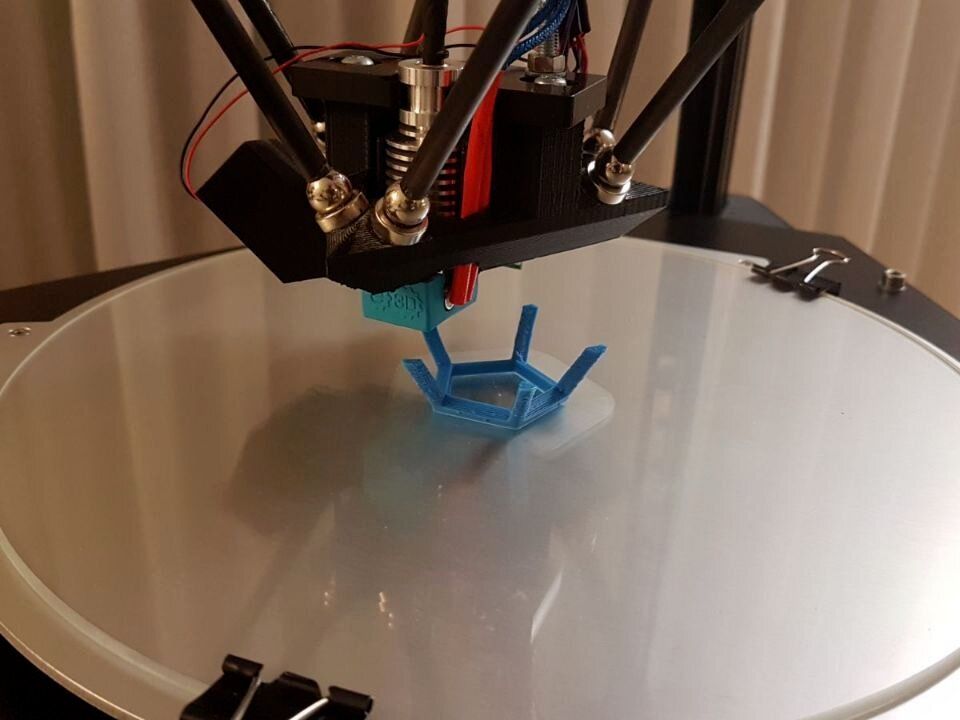
Once everything was in place and properly configured, we could finally power it on and start the first test. Isn't that one of the best feelings when you invest hundreds of hours and then it finally comes alive? But of course, in the beginning, not everything worked out as expected. Some wiring was wrong, some things didn't work as expected but after some hours of reconfiguration we were there. Eventually we could print our first part:

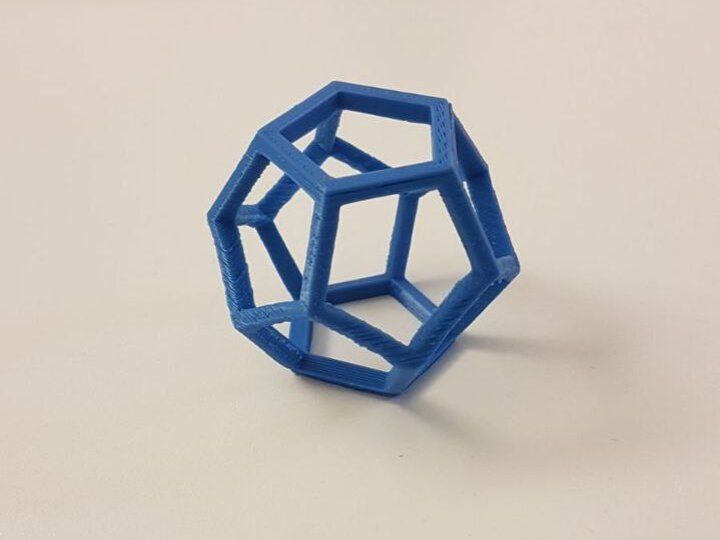
Yeah, shure. Nowhere near perfect but hey, it's something! One big problem we had in the beginning was the infrared sensor we used to measure the distance from head to surface. This is needed for calibration so the head would be on the exact same heigt everywhere one the surface. As it turned out, the sensor didn't really like the glass plate on top of the silver aluminium surface. So we painted it black, with a special heat resistant color and as matt as posible. This helped a lot, but even with the hardware properly set up, we were not happy. So let's start tweeking the software. We use Simplify3D, in my opinion one of the best ones out there. Yes, it is not free, compared to some other ones out there but certainly worth it when you see how much you can do with just a couple of software settings.
With every new part I printed, I learnt something new how to get the best out of it. By now, we are able to print in a pretty good quality. Still, this project is like a never ending work in progress.
One big step would be to set it up with a heated chamber to properly print ABS material. But this means we have to reprint most part of our printer in ABS which are currently made of PLA by the way. But to properly print this parts we would need a heated chamber. Do you see the struggle?